Sunday, 22 February 2015

Making the most of an unfortunate circumstance: Exploring Ice Part 2

Sadly a pipe in our classroom burst due to the extreme cold temperatures. We had some water damage and had to re-locate to another temporary classroom. Since we were already exploring and investigating ice, I decided to take advantage of this situation and use it as a learning opportunity. I asked if I could take the burst pipe to show the students what caused the leak. I suspected that they would be quite interested, as they had been asking a lot of questions about what happened and expressed concern about their work on the wall and portfolios being wrecked. 

I brought the pipe in the next day to show them. I passed it around and listened as students discussed what they noticed, thought, and any wonders they had.

"It might of froze and it started to get freezer and freezer and then the pipe broke because the ice was too strong because it was pushing the metal!" O. S.

"Some metal breaks and some doesn't." Z. G.

"Maybe the water was so cold and some of the cold air came through the window and it got so cold the pipe got a hole in it." C. C.

"It got so freezing outside then it got a medium crack and water started to leak out. The ice was so strong it peeled off the metal and made a leak." M. O.

"Water is so cold it is ice and made it freeze and crack." D. C.

"Maybe the heat wasn't on for the winter and it made the ice break and make a hole." B.K.

"Maybe the water squirted so hard it was so cold outside it made ice in it and caused a leak." J. K.

"I think there is ice in the pipe and water in the middle, and the water was so hard and popped out and started a leak." H. S.

"The air was so cold outside and it froze the water in the pipe and it got so hard and strong it pushed a hole in the pipe." K. W.

"The breeze was so cold and the old pipe broke and the old pipe can't hold it, the breeze broke it." C. D.

"The ice got so big it broke the pipe." O. M.

"Since the pipe is round there was a lot of water there and it made the pipe burst." A. T.


I was surprised by the theories they made about the pipe and how it became broken since I never mentioned anything to them. This made me wonder if any of them experienced a mishap like this at home in some way? 

As a way to further extend their learning about the capabilities of ice, I asked them if they wanted to put some water in a glass jar, set it outside and see what would happen? They were all on board to try.


One students decided to write the steps to our experiment. We also made some predictions of what we thought might happen!

"I think the glass is going to break because the ice will push. It might get too big and then the glass will break. Glass is more fragile than the pipe and so the ice is strong and breaked the pipe and will break the glass jar too." O. S.

"I think the glass will break because ice broke through metal and glass isn't as strong as metal." S. C.

"I think the water will freeze." O. M.

"Maybe the glass will break because the ice is strong." K. W.


The next day we retrieved our experiment from outside and observed what happened!

"The ice was pushing and hitting the jar and it bonged a piece off the jar!" J. K.

"The water turned into ice and made a piece break off the jar because ice is stronger than glass." M. O.

"But metal is stronger than glass. What happens to ice when it freezes? Is it bigger or smaller?" O. S.

"It gets bigger because the ice is stronger than metal and the ice made a hole in the pipe." A. F.

"I think it gets smaller when it freezes. It gets smaller when it melts." P. I.

"I think it gets bigger because ice gets stronger and it depends how long you froze it. It gets bigger because it grows, it broke a piece off the glass." H. S.

Listening to the students, I noticed that they started to discuss the physical change of ice and used their observations to create theories based on the notion that ice either gets bigger or smaller when it freezes.


Once students who want to participate fill a sticky, we will come together and discuss everyone's thoughts and figure out what path it may lead us on!

Sunday, 8 February 2015

"I wonder how the icicles got built?" Exploring Ice Part 1

In keeping up with the cold weather, I introduced the students to a poem about icicles which they were noticing in our school yard and at home. 


The next day I showed the students a picture that Zahra (teacher candidate) took of some icicles she noticed while shopping.


Zahra explained to the students that she took the picture because she was amazed by how big the icicles were! 

That same day, L. B. wrote down a wonder she had about icicles and shared it with the class.

"I wonder how the icicles got built?" L. B.

"Maybe because it was so cold the icicles go bigger and bigger and bigger." K. W.

"Get cold water and we put it like this \/ (showing with hands), and it gets cold and gets bigger and freezes." C. C.

"If it snows, that is water, and it gets colder and it freezes and little icicles come together and starts growing." H. S.

"So when it snows, when it is out there for a long time it starts to melt, then when it drips sometimes when it's so cold it freezes. I know how ice is made because me and my dad build an ice rink in the backyard." O. S.

"Snow and water makes ice and that might make an icicles. One day I put water in the snow and it turned ice." D. C.

"When the rain comes, it gets cold and it freezes and it grows. Maybe when it gets more water and snow it grows." W. E.

The following morning, W. E. and E. E. made ice at home and brought it to school in a bag to share their experiment with their peers!

"I made ice, and how I made it was, last night I got water and I put it in the freezer. It got cold, stuck together then it grew." W. E.

"What did you pour the water in?" Mrs. Ralph

"I poured the water in this bag." W. E.

"You can't hold water. It's liquid." Z. G.

"But it's frozen, and when it gets really cold it starts to freeze and then it becomes a chunk that you can hold it, but if it's just water you can't hold it because it's slippery because it's not cold enough." O. S.

W. E. then asked if the ice chunk could be pass around so that people could feel it. 

"It's slippery!" C. C.

"Cold!!!" M. O.

"It feels watery because it's slippery on my hand!" K. W.

"It's starting to drip! If water drops out of ice, it starts to melt." M. S.

"We can make more ice!" E. E.

What does it look like? Can you describe what you see? Mrs. Ralph

"It's kind of see through white." C. C.

"It looks like milk." B. P. "Cause milk is white." M. S.

"But milk is darker then ice." F. D.

"It looks like a rock because they're both hard." J. K.

"I noticed that they have the same colour as our glass people (glass chess pieces)!" S. C.


"Milk is white and ice is clear!" S. C.

Taking advantage of this learning opportunity, I introduced the words transparent, translucent, and opaque.


The ice chunks were then placed in a bin for continued hands on explorations by students.


The following day, two more students brought in ice from home!

K. W. came to school with a bag full of icicles! 

"My daddy came home and I got the idea. He used a really sharp shovel like a needle and then he holded it and then he jumped and he swinged the shovel and then some of the icicles got cut off and first we had like a treasure hunt and we had to dig for them!". K. E. 

F. D. also brought in ice and explained her experiment to the class.

"I made ice and how I made it is first I put hot water, then I put it in a cup, then I put it in a bag, and then I left it outside." F. D.


The icicles and the ice in the cup were passed around for students to explore.

"It's watery and bumpy." K. W.

"Slippery." C. D.


"I was holing onto it and it almost slipped out of my hand!" J. K.


"It has snow in it and making a little sound, on the top it is translucent and on the bottom transparent." B. K.


"It's cold, bumpy, and smooth." E. E.

"It has some snow on it, and it's kind of grey and a bit of black on it." Z. G.


"It is really really super cold." S. T.


"It smells like dirt." F. D.

"It smells like dripping rain." M. S.


"It smells wet." L. S.


"I see little bubbles in it, I think it's water." L. B.


"It's a shape of a cone and then it grows!." J. K.

"Cylinder." B. K.


"It was transparent, I saw M. S. through it. Not all of it was transparent, some of it was translucent." K. E.


"It looks like a triangle." A. F.


"I hear a sound, a crackling sound. It is cracking because it's not outside anymore. At the bottom is transparent, at the top is translucent." E. E.

"It is crispy at the edge and in the middle it is smooth. There is a crack in the middle and bubbles in the middle, they were water and turned into ice." W. E.


"Why is the ice cup shaped?" C. D.

"How did the bubbles get froze when the water was moving?" W. E.


"I wonder why did the bubbles get frozen when the water was in the ice." K. W.


The students had many observations, theories and wonders. Together we created a chart to place all the information.


The excitement was growing! A few more students brought in icicles and ice made in their freezer at home.

"First my mom breaked the icicle and then we put them in the freezer so they would stay cold and wouldn't melt." C. D.

"My ice is a triangle shape. I made it at home, I got a bag of water and I put it in the freezer and waited eighteen days, and it froze and I couldn't wait to share it with my classmates. I used plain, it was cold because I wanted it frozen solid." M. O.

"I made ice, and how I made it is first I put water in a container and then I put it in the freezer and waited four or five days and it turned into ice. H. S.


All the ice was passed around for further exploration.

"It's transparent because I can see through it." M. O.

"J. K.'s is translucent and opaque." W. E.

"Why does J. K.'s ice look like that and C. D.'s does not?" Mrs. Ralph

"I think because maybe the water, the rain and the kitchen water are different kinds of water because the rain is see through and the kitchen water you can't see through it." W. E.

"Maybe because J. K.'s was in a bag and C. D.'s was outside and J. K.'s came in a chunk and C. D.'s was an icicle." K. W.

"Because maybe J. K. put lots of cold water and maybe C. D.'s icicle might have a little bit of water because it dripped off and was thin and J. K.'s had a lot of water." O. S.


H. S.'s ice experiment

"It is grey and translucent and it feels like ice, slippery and looks like a rectangle." A. F.

"It looks like a triangle and it is cold and slippery like snow." D. A.

"It is cold and flat and looks like a hill." D. C.

"I think maybe it wasn't on a flat surface and that's why all the water went on that side then less water went on the other side." O. S.

"And that's what happened cause I poured water in and it went like that (making a diagonal line with her hand), so when I put it in the freezer it was still like that." H. S.

"When you put it in a container and you put the water, and you put it in the freezer, the cup you put it in it turns into that shape." P. I.


S. C.'s ice experiment

"I put water in my bowl, then vinegar, and then I put cotton balls, and then I put pink food colouring and it turned orange! I wanted to make it colourful and I wanted to know if orange ice turned out to be real and it is!" S. C.

Our orange ice wonder was also passed around for further exploration!

"It's cold and a little heavy maybe because S. C. put a lot of things in it." K. W.

"It's kind of super cold and I see red stuff." M. S.

"It smells like apple juice." B. K.

"It feels slippery." L. S.

S. C.'s colourful ice led to some exciting experiment ideas!

"Lets make ice yellow in the shape of a rectangle!" K. E.

"Purple and a rectangle!" M. O.

"Put food colouring in our ice!" L. S.

"Green food colouring in a square shape!" Z. G.

"Use outside water and put food colouring and see if it is different!" W. E.

"How are we going to get water from outside?" Mrs. Ralph

"Find an icicle and let it melt and use that water." H. S.

"Or let snow melt in a container and put that water in the freezer." O. S.

"Wait until the rain comes." L. S.

"Put food colouring in milk and freeze it!" E. E.

"Get water in a jar and put salt and food colouring and put it in the freezer." W. E.

"Maybe we can make ice from rain and the tap?" A. T.

"How many days or months do we have to wait for ice to melt?" P. I.

What wonderful authentic experiment ideas! Stay tuned as we explore and investigate ice further!


Sunday, 1 February 2015

An Inquiry on Towers: Building on Children's Interests

I recently read an article titled "The Plan: Building on Children's interests" by Hilary Jo Seitz. In the article, "The Plan" is a four-step process that consists of sparks, conversations, experiences, and theories and more questions. It is circular in motion and often allows for different investigative directions to take place (Seitz, 2006). 

"The Plan" seemed very straightforward and logical to me. It further supported my thinking about inquiry and enabled me to reflect on a strong interest that was starting to ignite in the classroom. The four-steps spoke to me so much that I decided to share the concept with the students and co-construct our bulletin board display to include the headings as a guide during our tower inquiry. Below is our tower inquiry journey thus far. Please note that this is our interpretation. 


Sparks (provocations)—Identify emerging ideas, look at children’s interests, hold conversations, and provide experiences (Seitz, 2006). 


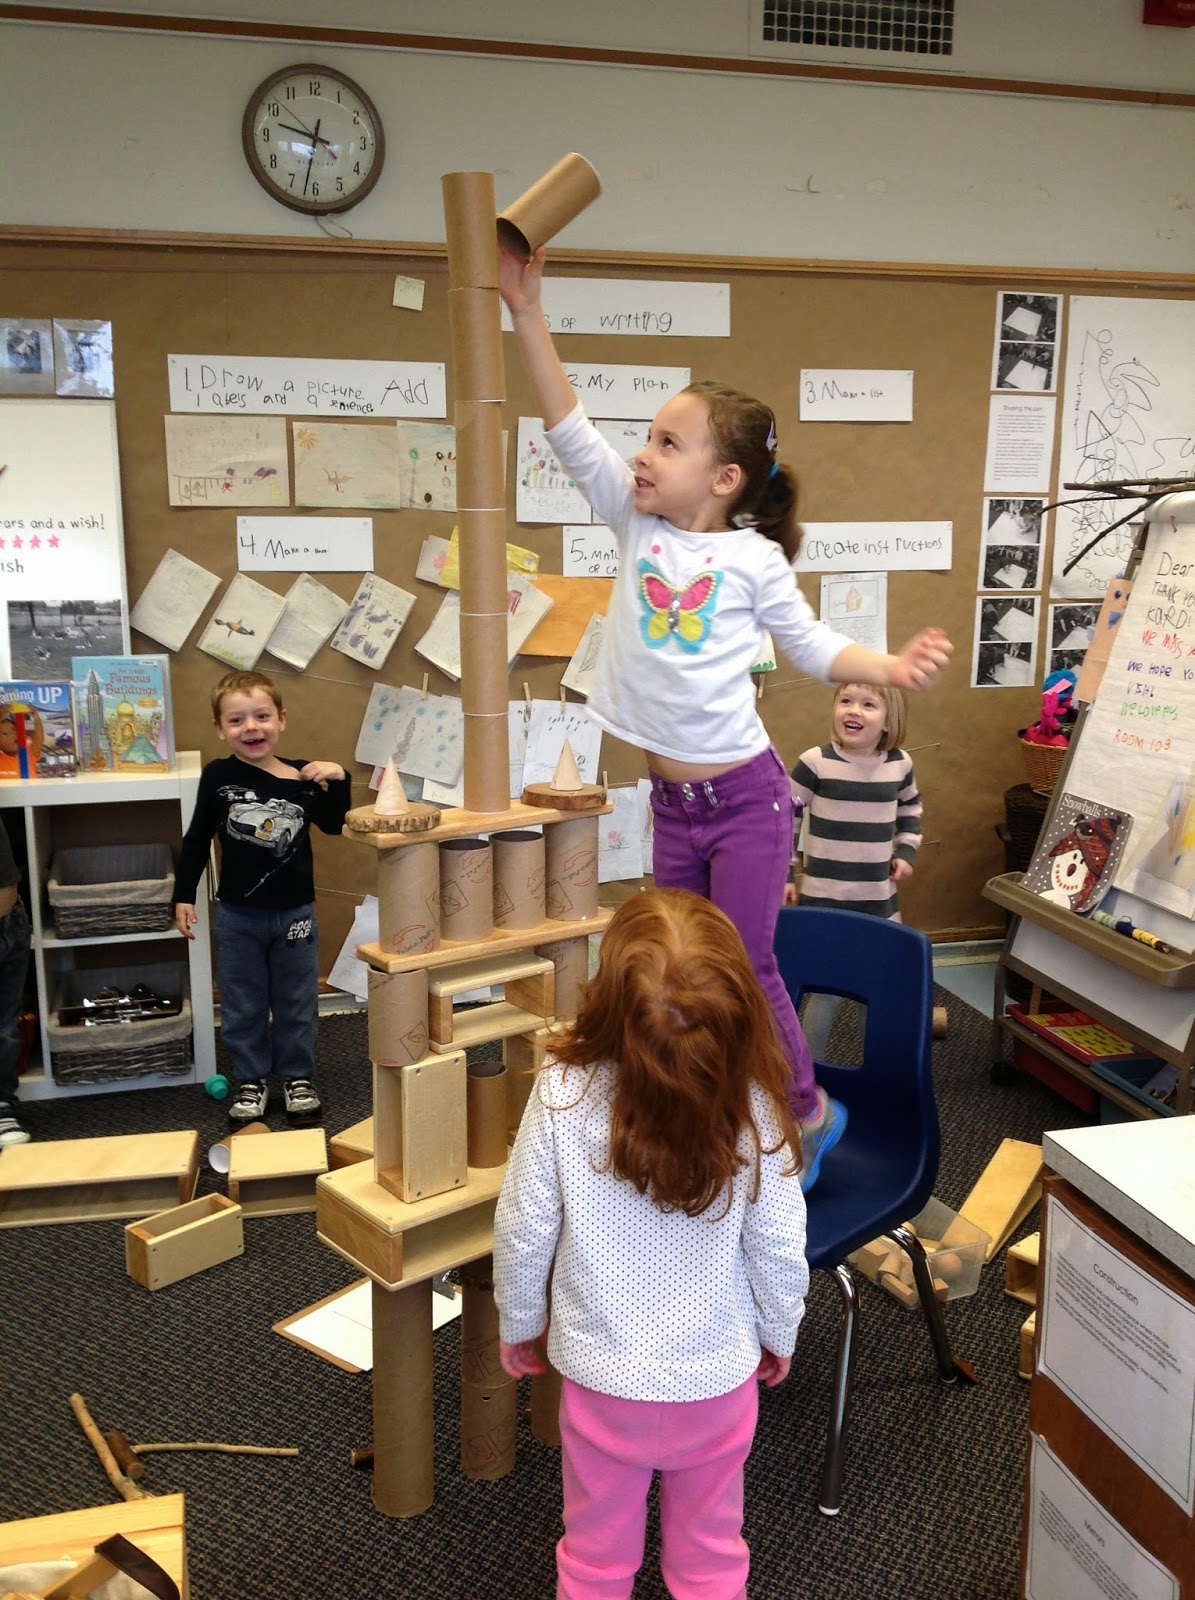
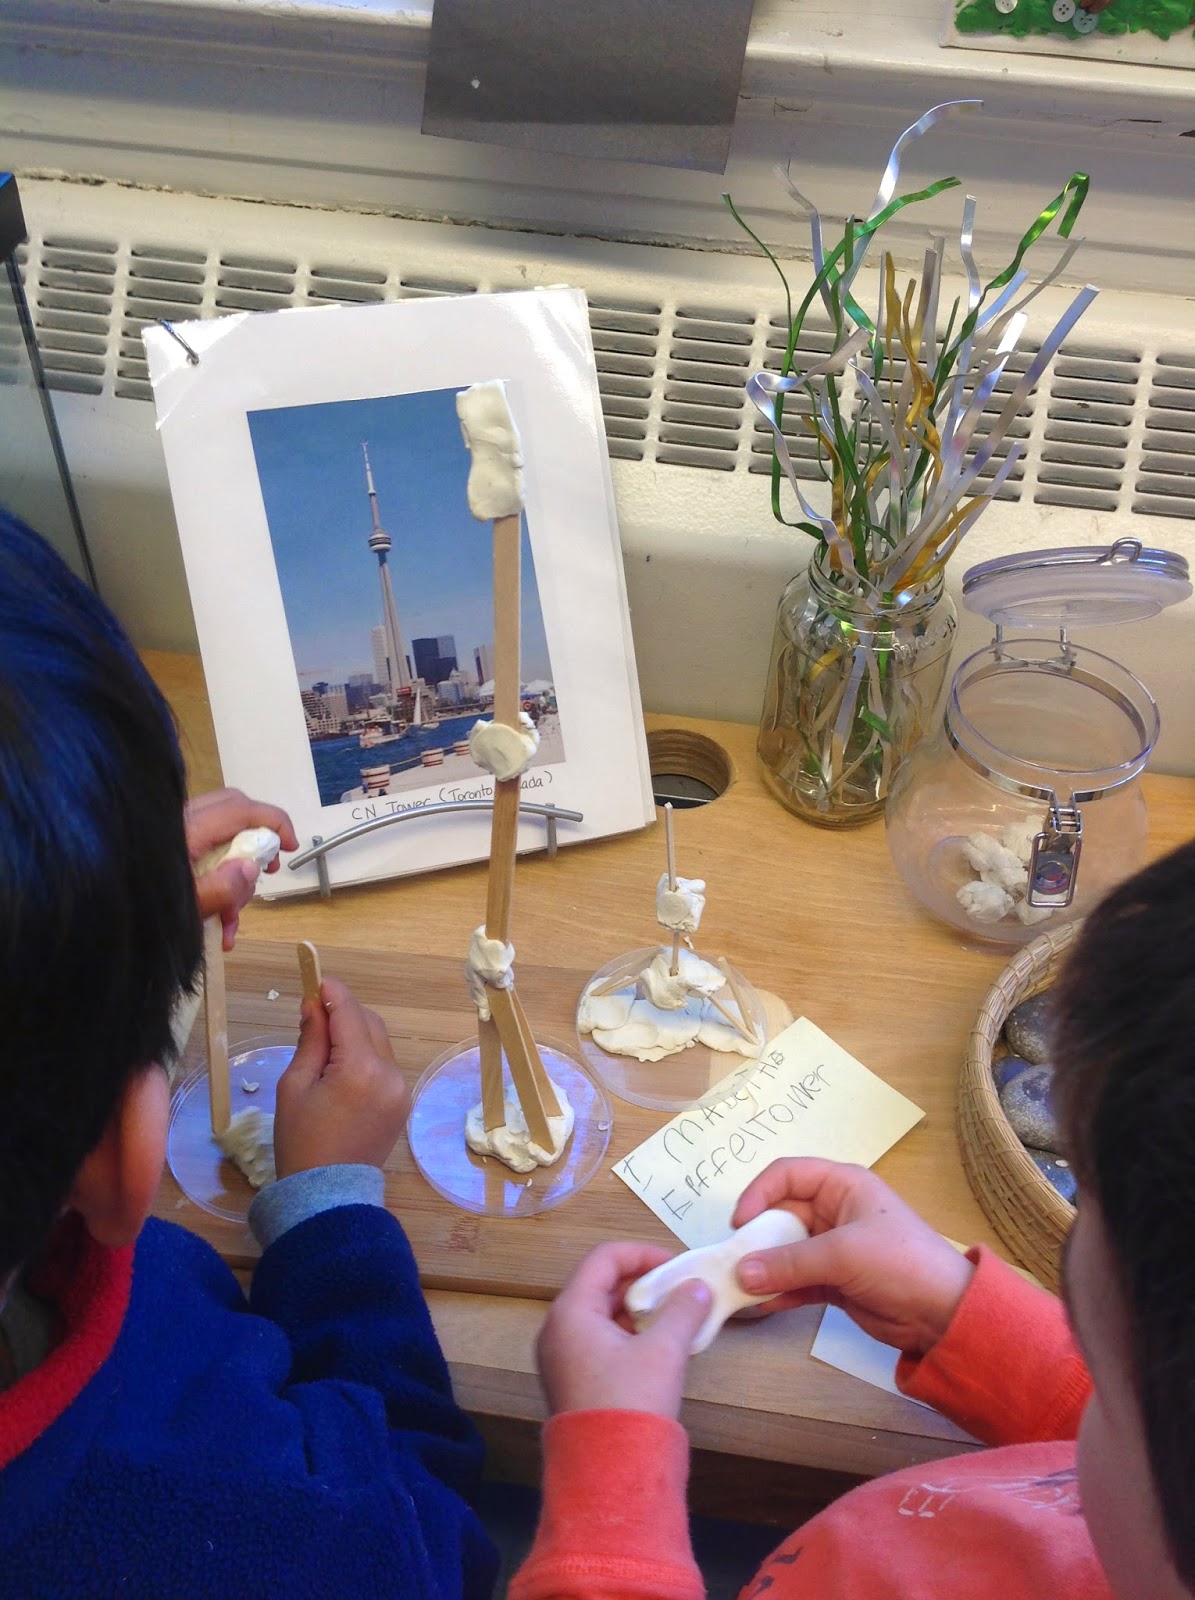
In December, I started noticing that many students were creating towers at various learning areas in the classroom. Having access to measuring tools (rulers, measuring tape), students were motivated to build towers as high as they could, then measure them to figure out how tall they were. Noticing this interest, I decided to place some books and pictures of different towers found around the world at the Construction Area and see what would happen. 


I started noticing that the tower creations became more intricate and involved, and since many students visited some of the towers in the pictures, there was an intrinsic connection to the structures being built.


Conversations—Have conversations with interested participants (teachers, children,
and parents), ask questions, document conversations. Ask “What do we already know? What do we wonder about? How can we learn more? What is the plan?” (Seitz, 2006). 

As the interest in tower building continued, students became quite familiar with the names and appearances of various towers around the world. I then decided to start conversations with students as a whole group, during the sharing of their structures, as well as in smaller groups allowing for more in-depth conversations. I started by asking students what they knew about towers and what wonders they had.

What do you know about towers?

“When people build towers they start building the bottom first so they can make it stable on the bottom and make it taller.” O. S.

“People can go inside the Leaning Tower of Pisa!” K. E.

“We can go in the Chrysler Building.” E. E.

“At night you see the elevator of the CN Tower from outside and it looks like a dark blue car driving up it!” Z. G.

“Lots of towers look like a triangle so they can put the straight point and make it stable.” 
W. E.

“The Leaning Tower of Pisa was not straight up, it was leaning.” K. W.

“A skyscraper has a red light on the top that blinks.” D. A.

“So airplanes won’t fly in it.” Z. G.

“People that build stuff build towers.” C. D.

“Every night the Empire State Building lights up!” W. E.

“A really tall building is called a skyscraper.” M. S.

What do you wonder about towers?

“How many days did it take to build the Burj Khalifa?” O. M.

“How many towers can you go inside?” O. M.

“I wonder when the Leaning Tower of Pisa started tilting?” H. S.

“Who makes the material to build the towers?” E. E.

After asking this question, students started listing materials used to build towers.

1.         Metal                      6. Cement
2.         Wood                     7. Stones, rocks, pebbles
3.         Glass                     8. Concrete
4.         Paint
5.         Bricks

“How does the Leaning Tower of Pisa not fall down because it leans?” L. B.

“Why do towers look different?” W. E.

Opportunities and experiences—Provide opportunities and experiences in both the classroom and the community for further investigation, while documenting those experiences (Seitz, 2006). 

With the hopes of furthering their knowledge and supporting their explorations and investigations, purposeful materials and resources were placed at different areas in the classroom enabling students to self select and drive their own research and theories that were of interest to them.

Sharing personal experiences through dialogue and pictures also greatly supported learning. During the winter break, E. E. and W. E. went New York and took many pictures of the different towers they saw and visited. The knowledge they shared and the new information gained by their classmates was amazing and was evident in the various works created by students.

Below is some of the information that was shared by E. E. and W. E. with their classmates through dialogue and pictures:

"The Empire State Building has three elevators and one escalator and at the very top everything looks very small and you can see the Statue of Liberty!" W. E.

"We saw the whole world when we were at the top!" E. E.

"It had lots of windows. Why doesn't the Burj Khalifa have lots of windows?" E. E.

"This is the Chrysler Building, in the daytime the lights don't light up." W. E.

"It has lots more windows than the Empire State Building." E. E.

"It lights up at night to make it look pretty." W. E.

"The Empire State Building was the tallest building because when we were at the top the other towers looked smaller." W. E.

"Why do they all have points at the top?" K. E.

"Because that's how it goes thicker at the bottom and thinner at the top!" H. S.

"And so that when planes fly by they can see the tower!" E. E.

Experiences of exploration and investigation using purposeful materials:


Theories—Think further about the process. Document questions and theories. In other words, teachers, children, and parents identify something of interest; we discuss what we know about it or what we want to know about it; we experience it or have opportunities to learn about the idea; and then we discuss what we did and either ask more questions or make new theories. We document our understandings throughout the whole process (Seitz, 2006). 

I noticed that the students were using the words tower and skyscraper interchangeably. So I decided to ask them the question: Is a tower a skyscraper? 

"They make towers strong and tall so they don't fall over." S. T.

"A tower is a skyscraper because it's tall and it almost touches the sky!" Z. G.

"A skyscraper is a kind of building that's called a structure. It depends how tall towers are. If you have a really tall building or structure, it's a skyscraper." O. S.

"But the Statue of Liberty looks like a person, it's not a building." P. I.

"It has doors; it's a statue and a building." Z. G.

"But a skyscraper has to be tall and it has to touch the sky like a tower!" W. E.

"A skyscraper is something that is really tall and has a sharp point at the top." F. D.

"A building has a lot of windows and a skyscraper doesn't have that much." H. S.

"A skyscraper is a really tall building that can touch the sky and has a point so it can scrape the sky." K. W.

"The CN Tower is not the same size as a building." M. O.
Thought about his house and how it's a building.
"The CN Tower is way taller than my house so it's not a building." M. O.

"Yea, my grandma lives in an apartment building and it's smaller than the CN Tower!" O. S.

This was an interesting discussion. Many different aspects were coming out of this conversation. What is a tower? What makes a tower a tower? What is a skyscraper? Is a tower a skyscraper? What is a building? What is a structure? In the end, there seemed to be opposing views by students. Some who argued that towers are little and skyscrapers are big. Others thought towers are taller than skyscrapers. It is not important who is correct but the critical thinking and reasoning they give to defend their theories. We will continue to investigate...

Just a few days ago, a new spark ignited yet another direction of investigation. During a group sharing, O. S. asked to share something she researched with her dad the previous night on the computer. I had no idea what she was going to share, but I loved the fact that her learning and motivation was extended to the home environment and brought back to our classroom.  She took out a piece of paper and told us that her dad and her researched how tall the CN Tower was in feet on the computer. As an aside, the students have some familiarity with the measurement in feet, which stemmed from our bat inquiry having had to figure out how high 12 feet was to place our bat box in the spring. O. S. showed me the written note her dad gave her to share with the class. I asked her if she could then write how tall the CN Tower was on our easel so we would remember. I was so excited, as I was hoping this may lead to students inquiring about the height of other towers leading to further explorations and investigations in comparison etc. The pictures below showcase the combined work effort of some students. I showed them how to use the computer and read the number to their friend who was writing on the easel. It was remarkable to step back and see how well they managed on their own. Most importantly it was nice to see how well they supported each other, how driven they were, and confident!


In supporting our current wonders, we will continue to converse, experience, and share new theories that arise from our research on towers.